


Before proceeding with a climatic test, it is extremely important to understand the scope of the test to be performed and the kind of material to be tested. Based on the above, you will be able to properly manage all the settings from the climatic chamber.
In this article we will see how to perform a climatic test for textiles, the reason why we perform this test and what is the most suitable climatic chamber for it.
Given the type of material, you should take into account, before starting the climatic textile testing, that we cannot run it before making sure that we are matching with an official procedure.
In this specific case we are referring to the regulation ISO 139, that regulates weathering textiles testing and clothing material, and in general the standard conditions for a textile testing laboratory. It firstly specifies that samples should be put in a normal environment (Standard Atmosphere) for a fixed time, according to the type of textile to be tested.
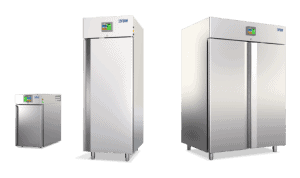
Discover the specific FDM climatic chambers for Fabric Tests
Standard Conditions for Textile Testing
Before proceeding with a climatic textile test in the laboratory, there are some conditions that the ISO 139 reference standard establishes, in order to have reliable final test results.
The standard lays down climatic conditions and the limits under which the sample must be tested. Often, textile testing laboratories perform part of the test with unreliable equipment.
The FDM climatic chambers, instead, are designed to perform these tests in a unique environment and according to the indications from the ISO 139 regulation.
The endurance test , for example, is all completed inside the climatic chamber, without having to move the sample several times and risking to lose reliability in the final results.
Let us see in detail what the standard atmospheric conditions for textile testing from ISO 139 are.
Starting Atmosphere (Standard Atmosphere)
The "Standard Atmosphere" means fixing starting climate conditions under which the textile sample is exposed, before proceeding with the actual test.
The environmental temperature, to be set on the climatic chamber, must be 20°C, while the relative humidity must be 65%.
The period of sample exposition to the standard atmosphere, varies according to the material type and is defined by the reference standard.
Variation limits
During the testing process, the environment where the samples are tested must not deviate from the ISO 139:2005.
In fact, temperature can vary to a maximum of ± 2°C, while the relative humidity to a maximum of ± 4%.
These limits can be directly set from the chamber’s controller, that constantly monitors the two parameters, also thanks to sensitive temperature and humidity probes.
Final result tolerances
Even in case the test procedure is followed step by step, there will always be external agents that might affect test results.
According to the BRITISH STANDARDS – specifically the BS4194:1967– a climate textiles test allows two types of tolerances:
Tolerance 1. Temperature ± 2° C, Relative humidity ± 5%
Tolerance 2. Temperature ± 1° C, Relative humidity ± 2%
They differ in the type of test that will be performed.
Necessary Requirements of a Climatic Chamber for Textiles Testing
Let us now see what are the most important features of a climatic chamber:
There are three main factors to keep in mind:
- Temperature variation rate
- Internal dimensions of the chamber
- Product to be tested
Temperature variation rate
The first thing to consider, with any test chamber, is temperature; in particular the available temperature range and the temperature variation rate.
A standard chamber ranges from -25° C to +70 ° C. However, the most performing ones can reach a way wider temperature range.
The temperature variation rate is a fundamental parameter for a successful test. This value proves the performances and reliability of a climatic chamber and should not exceed ± 0.2/0.3° C.
FDM chambers are more than performing, with an internal temperature variation of just ±0.1° C.
Discover the FDM Climatic Chambers specifics for Tests on Fabrics
Internal dimensions of the chamber
You should also consider the internal dimensions of the chamber, that are among the most commonly overlooked factors.
In order to obtain accurate results, the chamber must have a sufficient airflow, in relation to the overall dimensions of the tested samples.
However, it is always a good idea to buy a slightly bigger test chamber than you think may be enough for your tests.
The product to be tested
Also the type of material to be tested will determine what kind of chamber to choose.
FDM guides customers in choosing the right climate chamber, according to the required test.
Please note that the chamber must be correctly calibrated in order to provide accurate results.
Climatic Textile Testing Procedure
Let us now see how to perform textile testing with the right climatic chamber.
Here is the step by step procedure.
- First of all, verify the ambient temperature where the climatic chamber is located, and make sure that the operating temperature matches with the data declared by the manufacturer.
- Prepare and check the calibration of the temperature and humidity recording probes (usually it is performed at least once a year).
- Place the samples so that the air has access to all surfaces. Distribute the textile surfaces, only one layer per shelf.
- Start the preconditioning procedure (the Standard Atmosphere). Usually a sufficient time for preconditioning is reached after four hours at 20° C and at 65% relative humidity.
Unless otherwise specified, yarns, threads and similar materials have to be displayed in skein form.
The tests will take up to eight hours for the animal or viscous fibers and only two hours for the fibers with a recovery of less than 5% with a humidity of 65%.
Le fibre pesanti richiedono più tempo.
Final test report
Last step is preparing a test report.
The test report includes all processes, materials and procedures of the tests. It shows the conditions from each phase, so that you can understand why a material reacted in a certain way and make your inferences accordingly.
In general, the report should include:
- subdivision of the tested material
- equipment used
- test conditions
- procedure
- results
- critical results
- final observations
Would you like to receive a quote or do you have questions about the product?
Contact us to receive more information about this Product.